


How to Drill Clean Holes in Concrete (2 Methods for Handheld Core Drills)
July 11 2025Need to core drill a hole in concrete, brick, or block — but your bit just skips and skates?
Whether you’re running a mini-split AC line, cutting a dryer vent, or installing HVAC sleeves, clean hole starts are critical.
Here’s the issue:
To a core bit, a smooth wall might as well be glass. Without a groove, it just skates.
You might’ve watched a YouTube video and thought it was easy. You’ve got the drill. The bit. Marked your hole. But the second that bit touches the surface, it jumps like it’s allergic to concrete.
You’re not alone.
Even pros fight this battle — and here’s exactly how we win it.
✅ Two field-tested methods
✅ Step-by-step instructions
✅ Tools needed, pros/cons, and pro tips
✅ Written for handheld core drills only
Safety First: A Word on Handheld Core Drilling
Handheld core drilling is not beginner-friendly, especially when cutting holes larger than 4½ inches.
The torque involved can cause severe wrist, hand, or shoulder injuries when the bit binds or bites.
At our company, we do not hand-drill holes larger than 4½” — and even then, only when we can’t safely mount the core drill. Mounted rigs are always preferred when space and setup allow.
Even if your handheld drill has torque control or clutch features, all drills can and will grab at some point. The only difference is whether you walk away with a bruised hand or damage to tendons and joints.
Please use extreme caution and respect the power of the tool.
🥽 PPE Required for core drilling:
Eye protection — the best safety glasses are the ones you actually wear
Hearing protection — concrete cutting is always loud
Respirator or dust mask — especially if dry drilling indoors, and don’t go cheap on this one, silica is deadly
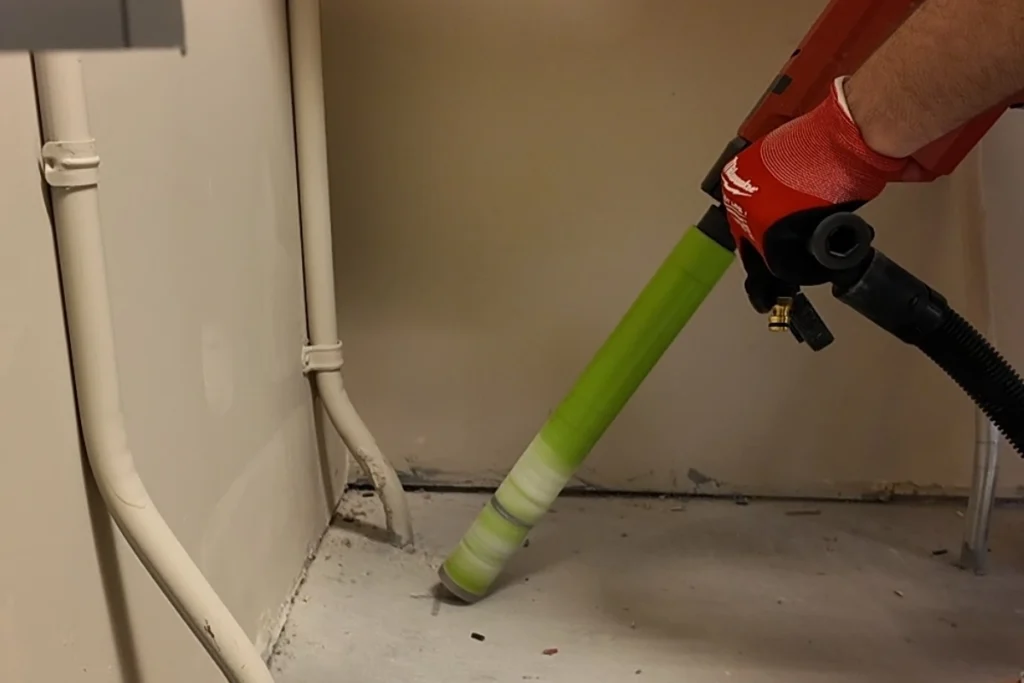
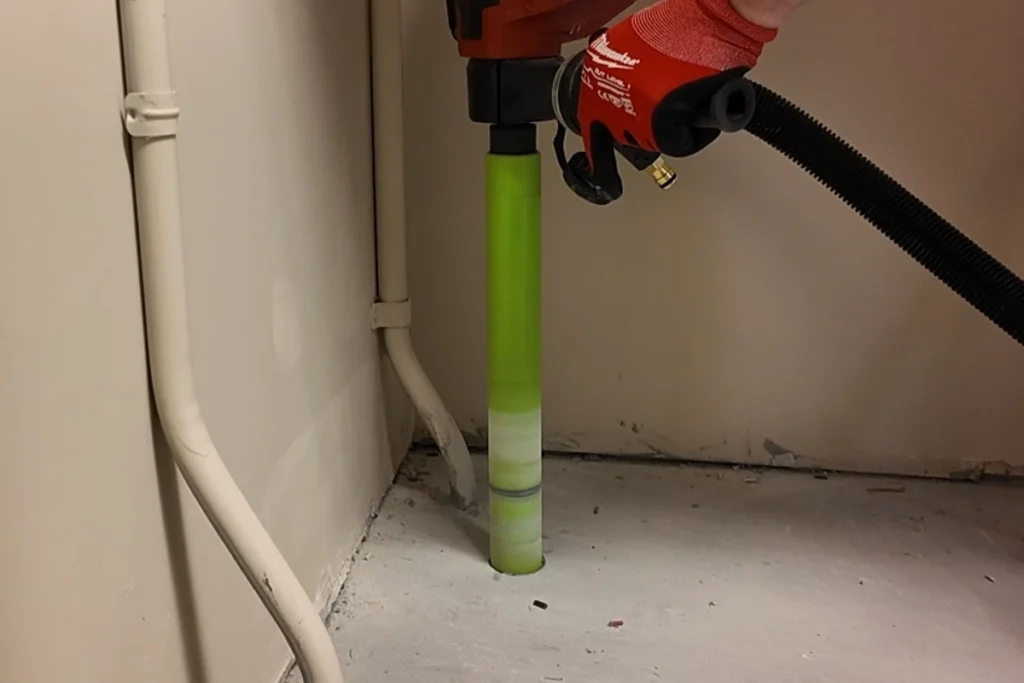
🔩 Method #1 – The Angle Start
Fast, Reliable Starts — Even on Smooth or Uneven Concrete.
This technique is effective when you prioritize speed over perfection.
No prep. No template. Just a steady hand.
🧰 Tools Needed:
- Handheld core drill (Hilti DD 150/150-22, Husqvarna DM 220/230 etc)
- Diamond core bit (wet or dry, honestly, you can use wet bit for dry coring, just make sure you cool it somehow)
- Tape measure and chalk for layout
- Water feed for wet coring, vacuum for dry
📐 How It Works:
- Start your drill at a 45° angle to the surface
- Apply light, steady pressure until the bit grabs
- Let the bit cut a shallow groove — about ¼” deep
- Slowly bring the drill upright to vertical
- Continue drilling
🧠 Why It Works:
A flat concrete surface gives your bit nothing to bite. The angle gives it traction and control, creating a starter groove to guide the bit perfectly.
✅ Pros:
- The fastest way to start a hole
- No template or prep work needed
❌ Cons:
- Can leave a small surface chip
- Slightly less accurate placement
- Takes a few tries to master
🎯 Best For:
Vent holes through block or slab
Quick electrical sleeves
Jobs where “close enough” is good enough
📏 Method #2 – The Template Guide
Perfect Hole Placement with Zero Skipping.
If you’re working on finished walls, penetrations that need precision, or tight tolerances — this is it.
🧰 Tools Needed:
- Core drill
- Diamond core bit
- Template (rigid plywood or plastic disc)
- Measuring tape, marker, level
- Concrete screws (Tapcon, Simpson, or equivalent)
- Drill + drill bit (to install screws)
📐 How It Works:
- Cut a round disk (¼” smaller than your bit) from plywood or rigid plastic
- Place and secure it at your exact drill location
- Start drilling — the bit will cut around the disk like a guide
- Once ~½” deep, remove the template
- Drill through as usual

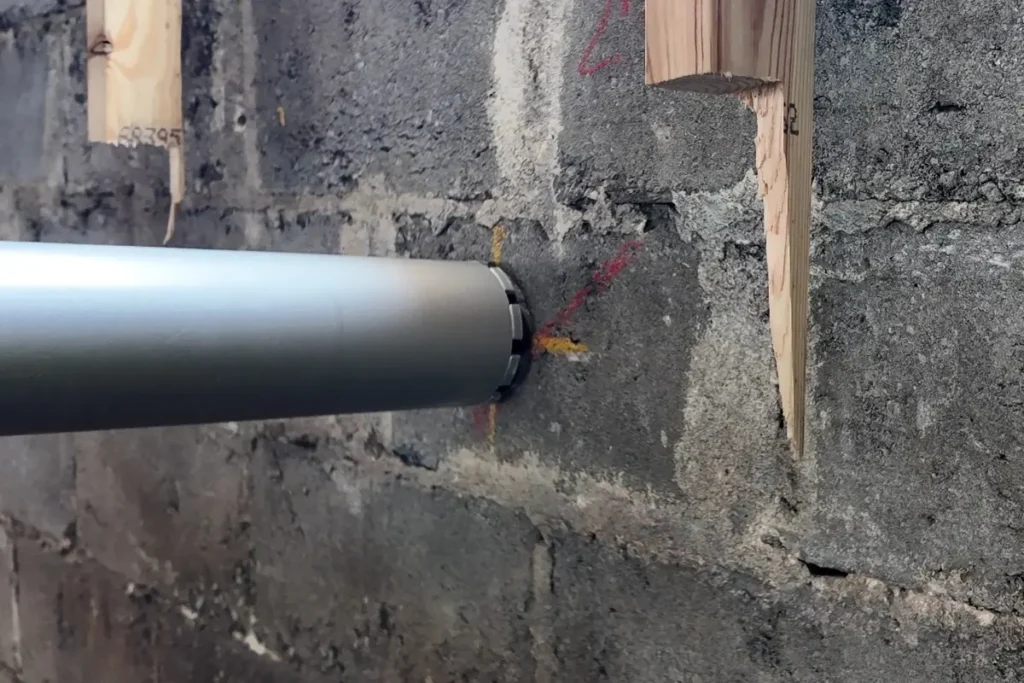
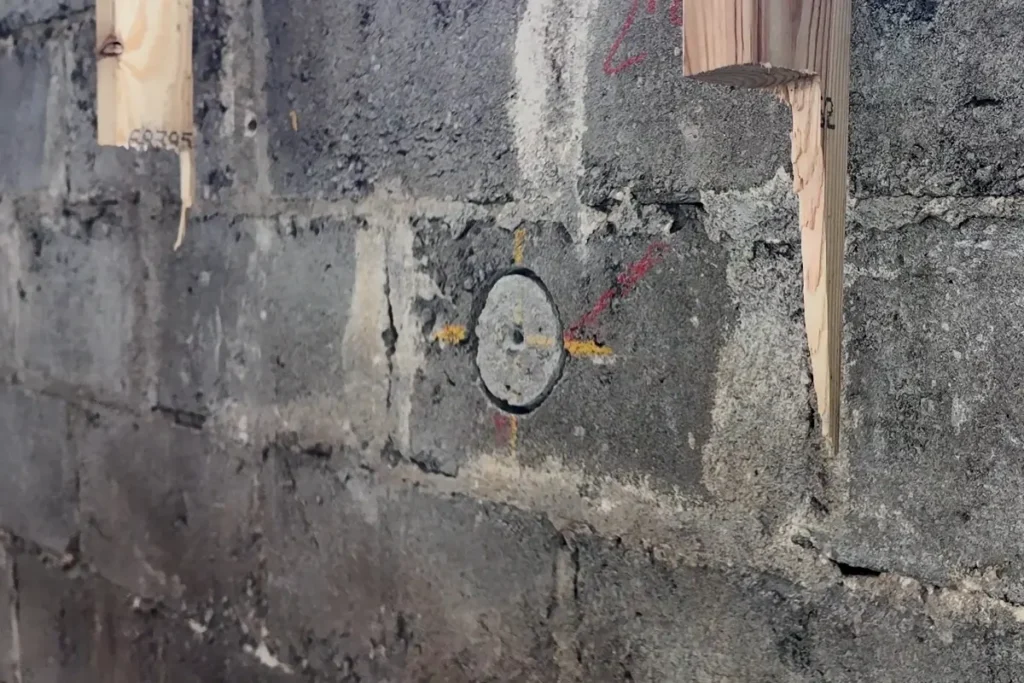
🧠 Why It Works:
You’re giving the bit a center guide that prevents wandering. The template keeps everything perfectly aligned during the most critical part of the cut — the first seconds.
✅ Pros:
- Perfect hole alignment
- No chipping or surface damage
- Ideal for beginners
❌ Cons:
- Takes longer to set up. You’ll spend time fabricating the template, measuring, and securing it in place.
- Requires extra tools and materials. You’ll need a drill, screws, and something rigid to use as a template (plywood, plastic, etc).
🎯 Best For:
HVAC and plumbing sleeves
Core drilling finished block or precast
Precision jobs where “dead-on” matters
🔚 Final Word
Drilling clean holes in concrete is 90% technique and 10% gear. Whether you’re a seasoned pro or DIY weekend warrior, these two methods will save time, money, and frustration.
Start smart. Drill once. Walk away clean.